
After Pinguino is all together comes the final push to completion. Finish steps include a final sanding, choosing and applying a protective finish to the boat, and completing the deck rigging, including figuring out how to do end pours. This video talks about the final sanding of the hull and deck in preparation for a finish coat. All the runs, bumps, voids and other blemishes left on the hull from your work with epoxy and cloth must be removed, or repaired to be made invisible. Obvious blemishes will be easily seen through your finish coat.
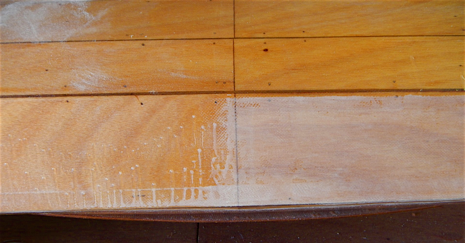
You will see that I apparently applied way too much epoxy in layering the edge of the shear seam, resulting in a tremendous amount of drips running down theshear plank. All of these drips and runs had to be pains-takingly removed by using my cabinet scraper and sanding. This took hours and kept me on edge as I tried to make the joint at the shear line disappear without sanding too deeply and compromising the integrity of the boat.
In a few places my sanding touched the top of the glass cloth itself, allowing dust to accumulate in the micro spaces opened up. I knew this would show under the finish coat. One solution was to apply a shear line strip over the finished boat. I may still do that, but I managed to hold off that decision by removing most of the dust using a rag flooded with rubbing alcohol. Vigorous rubbing of the effected areas removed ninety percent of the dust.

